Hotrod Home
Kelly Home
Falcon
Mustang
Grandson's Ride
Falcon History
Modifications
Falcon Drivetrain Specs
Mustang 351C Specs
New 351C motor build
Disk brake swap
9" Rear Buildup
Reference
Ford Engine Data
Ford Xmission Data
HydroValve Adjustment
Calculators
Ford/Auto Links
Fun Stuff
Wrecking Yard finds
Wreck of the ol' 351C
Send us a note!
Good Information

The Ford Falcon News

Classic Mustang mail list
Join us online!
|
 |
|
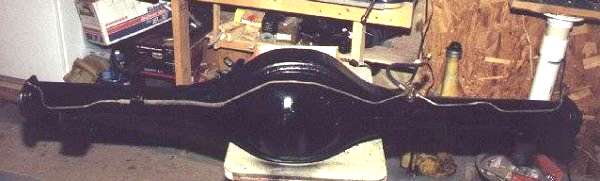
Here's the new housing with the brake lines
mounted. I had to drill and tap a 7/16x20 hole for the vent tube, which also
doubles as a hold down for the distribution block. I tack welded a small piece
of 18 gage steel no the driver’s side to help support the line on that side of
the car. |
 |
 |
|
The only thing
left to do to the axles was to put the wheel
studs in the axles. Peyton had pressed the bearings and retainers on for me,
so this was the last prep step for them. The Master Line axles are drilled
for three different bolt circles: 4 ½, 5 and 5 ½ inches. The Falcon uses a 4
½” bolt circle. I treated the installation of the studs as a very critical
step. I cleaned the studs and holes with brake cleaner, then used Loctite 271
on the threads and torqued them to 100 ft/lbs. The object was to help ensure
that the studs would (hopefully) never come loose in normal usage. Imagine
the feeling of loosening a lug and having the wheel stud rotate with it.
Then, imagine a torch closing in on your mags. Ouch! I used 2” studs, which
normally go on front wheels, so I could retain my spiffy chrome lug nuts.
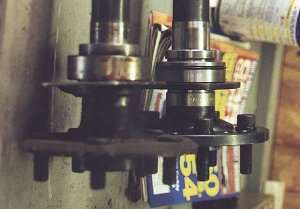
The photo gives you an idea of the beefiness of the Master Line axles compared
to the stock 8". The retaining plate is 3 or 4 times thicker as the stock
plate. The axle diameter at the bearing is larger than a big bearing Ford.
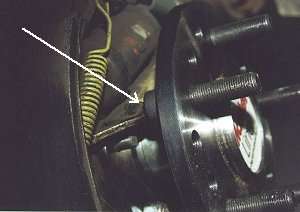
The new bearings use an o-ring seal rather than one located in the housing. The
final problem is pictured on the right. The wheel stud heads came very close
to the shoe spreaders. There appeared to be just enough clearance when the
retaining plates were tightened down, but I ground about .100 off of the
spreaders in that area just for insurance.
I used Richmond’s
recommended break-in procedure: 10 miles “normal” driving, cool down, repeat.
I'd recommend doing this at least four times before driving any real distance.
|
|
References:
Peyton Performance Automotive
422 FM 1493
Waxahachie, TX 75167
(972) 923-1698
Randy’s Ring and Pinion
11630 Airport Road #300
Everett, WA 98204
(800) 292-1031
www.ring-pinion.com |
Richmond Gear
P.O. Box 238
Old Norris Road
Liberty, SC 29657
(803) 843-9231
www.richmondgear.com
Tractech, Inc.
11445 Stephens Dr.
Warren, MI 48090
(810) 759-3850
www.tractech.com |
|
PARTS LIST
|
|
Part Number
|
Description
|
Mfg/Supplier
|
|
Housing
|
72 Ford Torino |
Ford |
|
187SL-17B
|
Detroit Locker |
TracTech |
|
69-0361-1
|
3.70 RIchmond street gears |
Peyton |
|
1K 9F-A
|
9" installation kit |
Randy's Ring & Pinion |
|
SK CS9F
|
Solid pinion spacer |
Randy's Ring & Pinion |
|
SVOM4635A
|
Ford Motorsports U-Joint |
Randy's Ring & Pinion |
|
N/A
|
Mark Williams 31 spline axles |
Peyton |
|
|
Narrow housing |
Peyton |
|
|
ARP ring gear bolts |
Peyton |
|
|
Small housing ends |
Peyton |
|
|
Axle bearings
|
Peyton |
| |
2" axle studs |
Peyton |
| |
Dorman U bolts |
Peyton
|
|
|