Hotrod Home
Kelly Home
Falcon
Mustang
Grandson's Ride
Falcon History
Modifications
Falcon Drivetrain Specs
Mustang 351C Specs
New 351C motor build
Disk brake swap
9" Rear Buildup
Reference
Ford Engine Data
Ford Xmission Data
HydroValve Adjustment
Calculators
Ford/Auto Links
Fun Stuff
Wrecking Yard finds
Wreck of the ol' 351C
Send us a note!
Good Information

The Ford Falcon News

Classic Mustang mail list
Join us online!
|
 |
|
First item on the agenda was to make or acquire
any tools needed to complete the project. Harbor Freight met my price
point for a 12-ton press with a $99 sale. I borrowed a torque wrench
capable of registering 175 ft/lbs from my brother-in-law. I used some
square steel tubing and some of the old bearing races to make press adapters
(something old, something new, something borrowed, etc.).
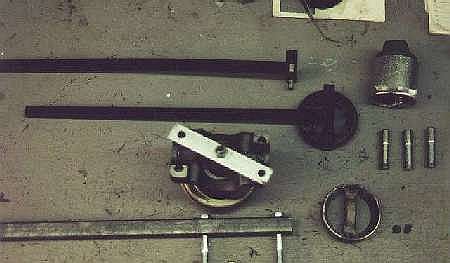
The homemade items above are
(clockwise from upper right): Carrier bearing press adapter, ring gear locating
studs, pinion race press adapter, bar with bolts to hold on to pinion flange
while torquing, piece of aluminum with a bolt for checking pinion preload, and
the spanner wrenches. The carrier bearing adapter is a 1 ½” pipe plug and union
with 4-5 threads ground out of the end. The pinion race press item is an old
race with the edges ground down.. The spanner wrenches are made from some ¼”
rod and ½” square steel tube cut and welded with my cheapie wire welder. |
 |
 |
|
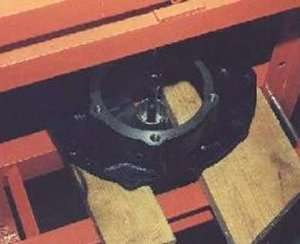
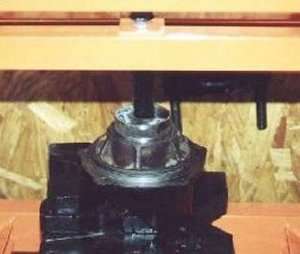
These pictures show the socket and extension used to press the tail bearing into
the case. Next, I pressed the bearing race into the pinion support.
|
 |
 |
|
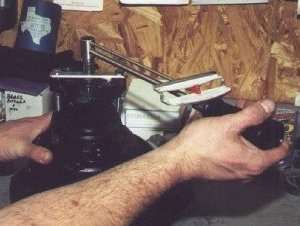
I used the solid pinion spacer and assorted
shims to get to the 15-25 in/lbs bearing preload requirement. The left photo
illustrates how I checked the pinion preload. The old crush sleeve measured.439
and the shim stack ended up at .446, so the old spacer measurement was of
limited help. I also gently tightened the pinion nut to 80 ft/lbs or so until I
was getting close to the right preload. I used the old nut until I had it right
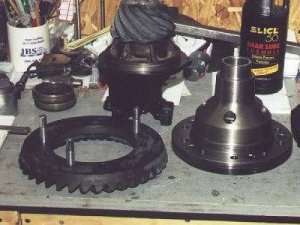
then used the new nut for the last torquing. The right photo shows the ring gear
with the guide pins installed and ready to press onto the locker. |
|